Marking Queens

Queen Marking Options


Queen marking is a simple process that can make locating your queen easier, especially for new beekeepers, but has other uses as well. In this section, we’ll walk through the basic methods, tools, and options available, along with a few practical tips and important do’s and don’ts. The goal is to give you a clear, realistic understanding of how it’s done so you can choose the approach that works best for you.
Before You Start
Before marking a queen, it’s important to understand what you’re looking at and what “normal” looks like inside the hive.
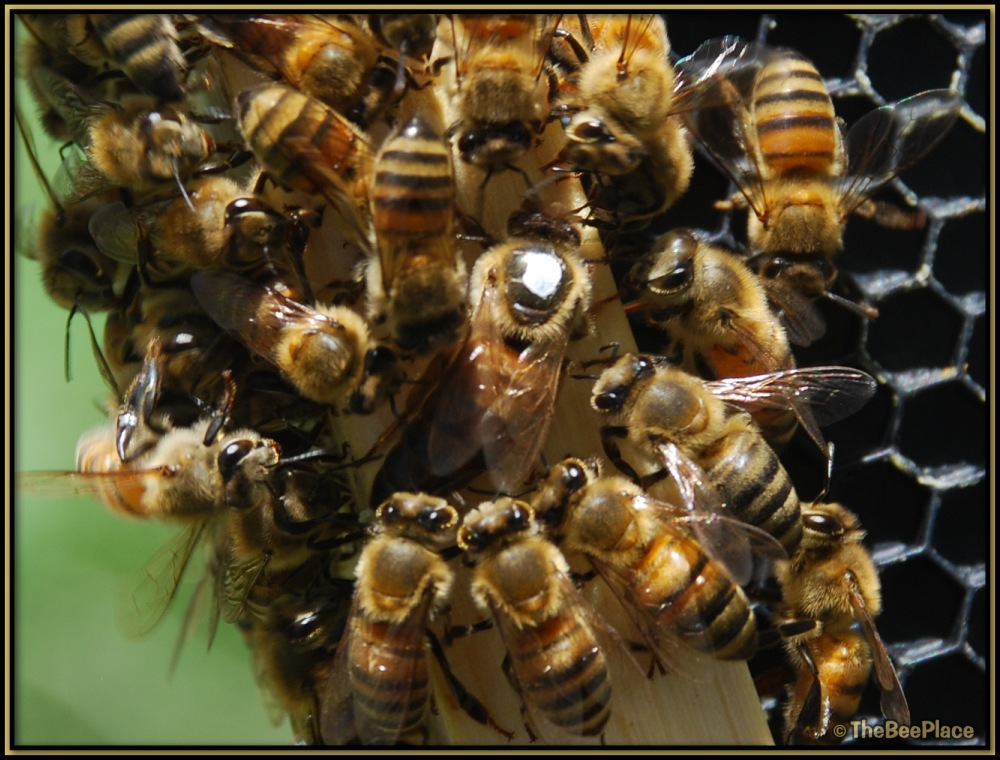
A queen moving across the comb with workers gathered around her is a healthy, natural sight. The bees may appear focused on her, feeding and tending to her as she moves through the colony.
When you remove her for marking and return her to the hive, you may notice the bees paying extra attention for a short time. This is normal behavior as they reorient to her presence and scent.
As long as the bees are calm and not forming a tight ball around her, there is no cause for concern.
The goal of marking is simple—make her easier to find next time and to identify her without wondering if it is the original queen (which can be deceiving if the mark wears off - more on this below). Everything we do from this point forward is about handling her safely and returning her to the colony without disruption.
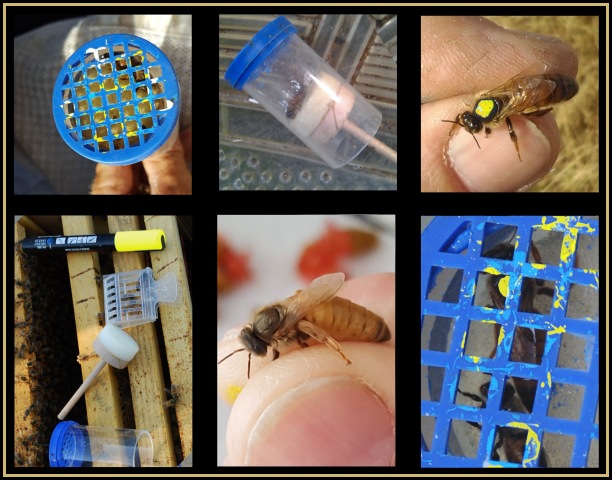
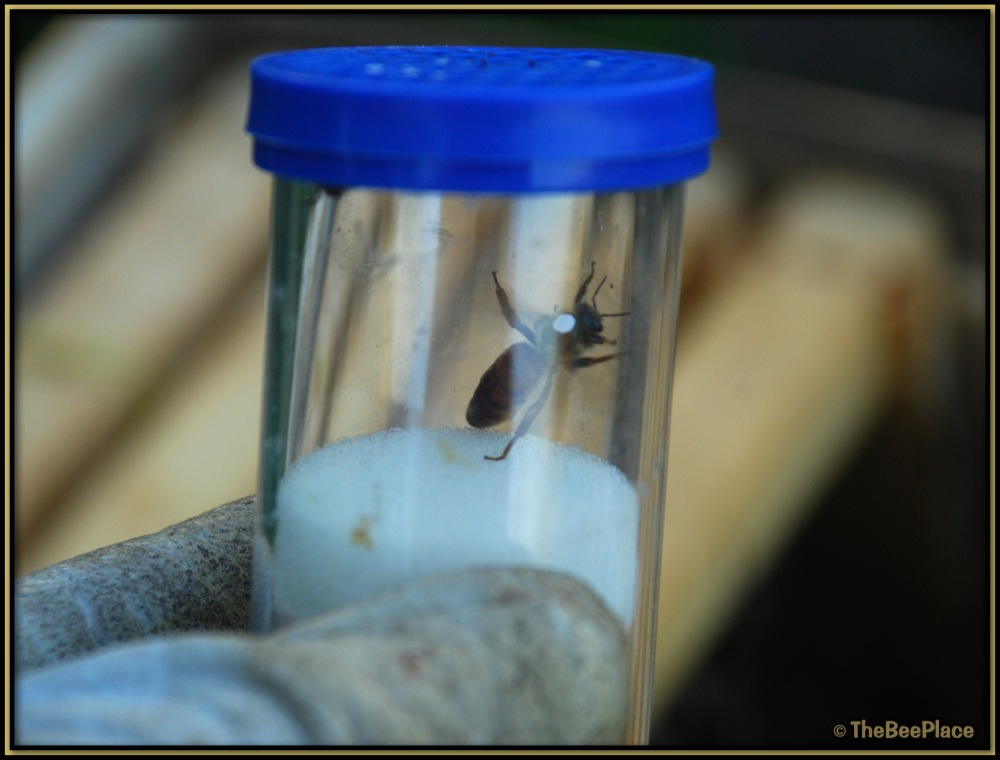
Using a Marking Tube
One of the easiest ways to handle a queen for marking is with a plunger-style marking tube.
This tool allows you to safely contain the queen while giving you control during the marking process. The soft plunger is used to gently hold the queen in place against the screen so you can apply a paint mark to her thorax.
To use it, place the open end of the tube over the queen and allow her to move inside. Once she is contained, insert the plunger and slowly bring it up until she is lightly held against the screen.
Only light pressure is needed—just enough to keep her in position while marking.
This method works well for beginners and those who prefer not to handle the queen directly. It reduces the chance of injury and makes the marking process more controlled and repeatable.
Hand Marking (Direct Handling)
Many experienced beekeepers prefer to mark queens by hand. Once you are comfortable, this is a quick and reliable method. This is best done with bare hands, as gloves make it harder to feel and control your grip. Wearing Nitrile gloves are another option. Bees normally ignore those and do not sting through them, so if you are not ready for bare handed handling yet, those are more suited for handling queens than bulky leather gloves.
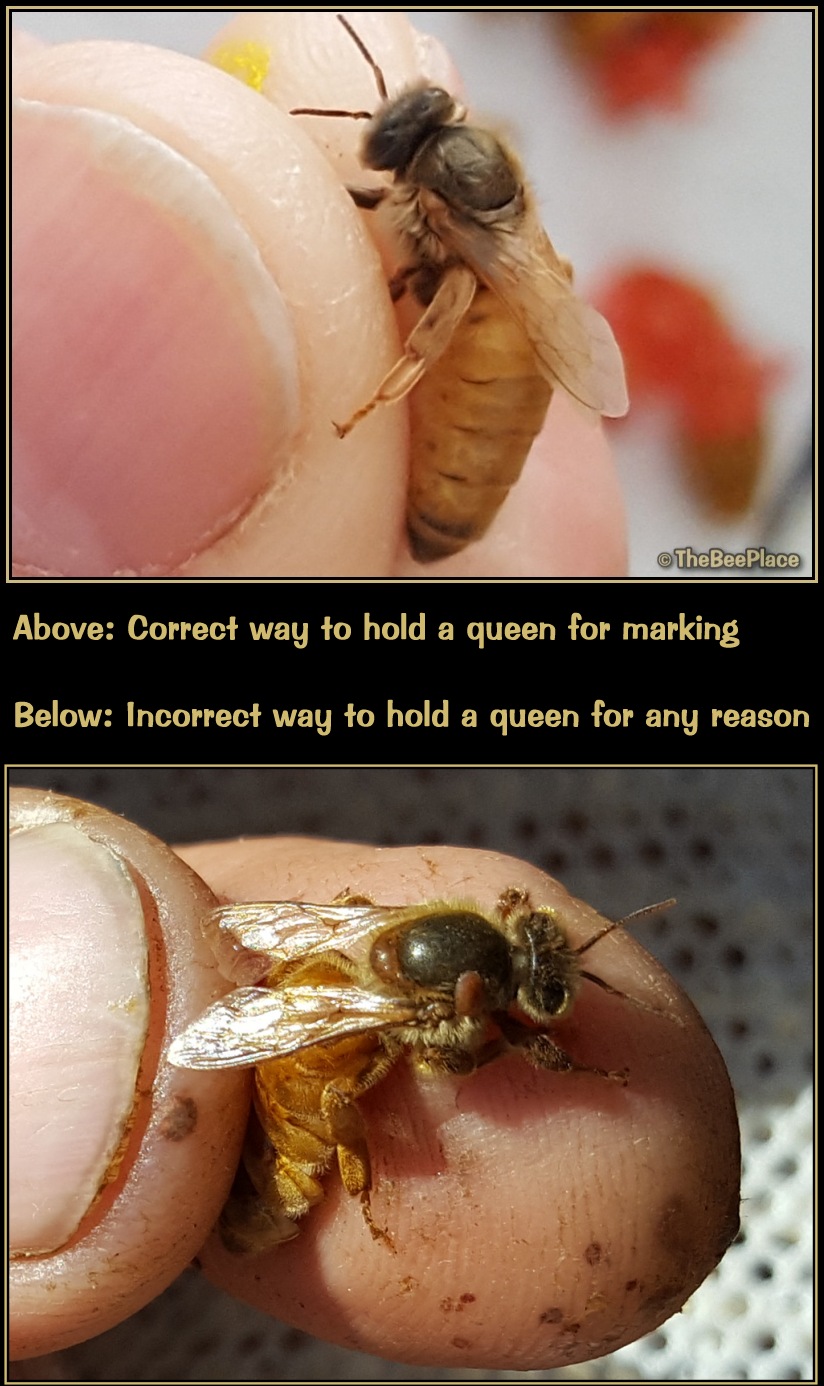
The queen is first caught by the wings, then gently held by two legs on one side of her body. This prevents her from turning and keeps her secure without applying much pressure.
It only takes a light grip—she is not going anywhere.
Holding two legs is important. If only one leg is held, the queen can spin, which may result in injury or loss of that leg. Using two legs keeps her stable and controlled.
You should never grab a queen by the abdomen unless you intend to replace her, as was the case with the queen in the lower part of the image shown. Grabbing or holding a queen by the abdomen can cause serious damage to her internal parts and while there may not be any visible damage, it can drastically effect her egg laying ability.
Queens do not sting people. Their stinger is used against other queens, not for defense like worker bees. This makes handling them far less risky than most people expect.
Once held properly, a small paint mark can be applied to the thorax, allowed to dry briefly, and then the queen can be returned to the hive.
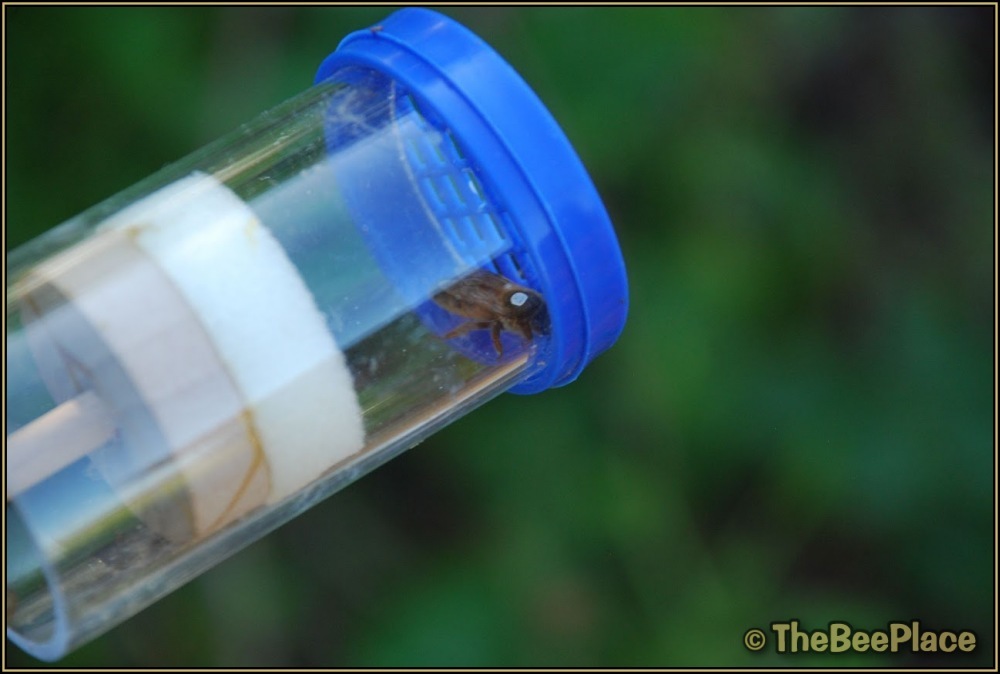
Let the Mark Dry
After applying the paint mark, it’s important to give it a moment to dry before releasing the queen back into the hive.
If the paint is still wet, worker bees will often clean it off, leaving you right back where you started.
Keeping the queen in a plunger-style tube makes this easy. Simply keep her away from the worker bees and allow a short time for the mark to set before releasing her back into the hive.
This only takes a brief moment but makes all the difference in keeping the mark intact.
For beginners, it’s a good idea to practice on a few drones before working with a queen.
Drones cannot sting, and practicing with them helps you get comfortable with catching, holding, and marking without risking injury to the queen.
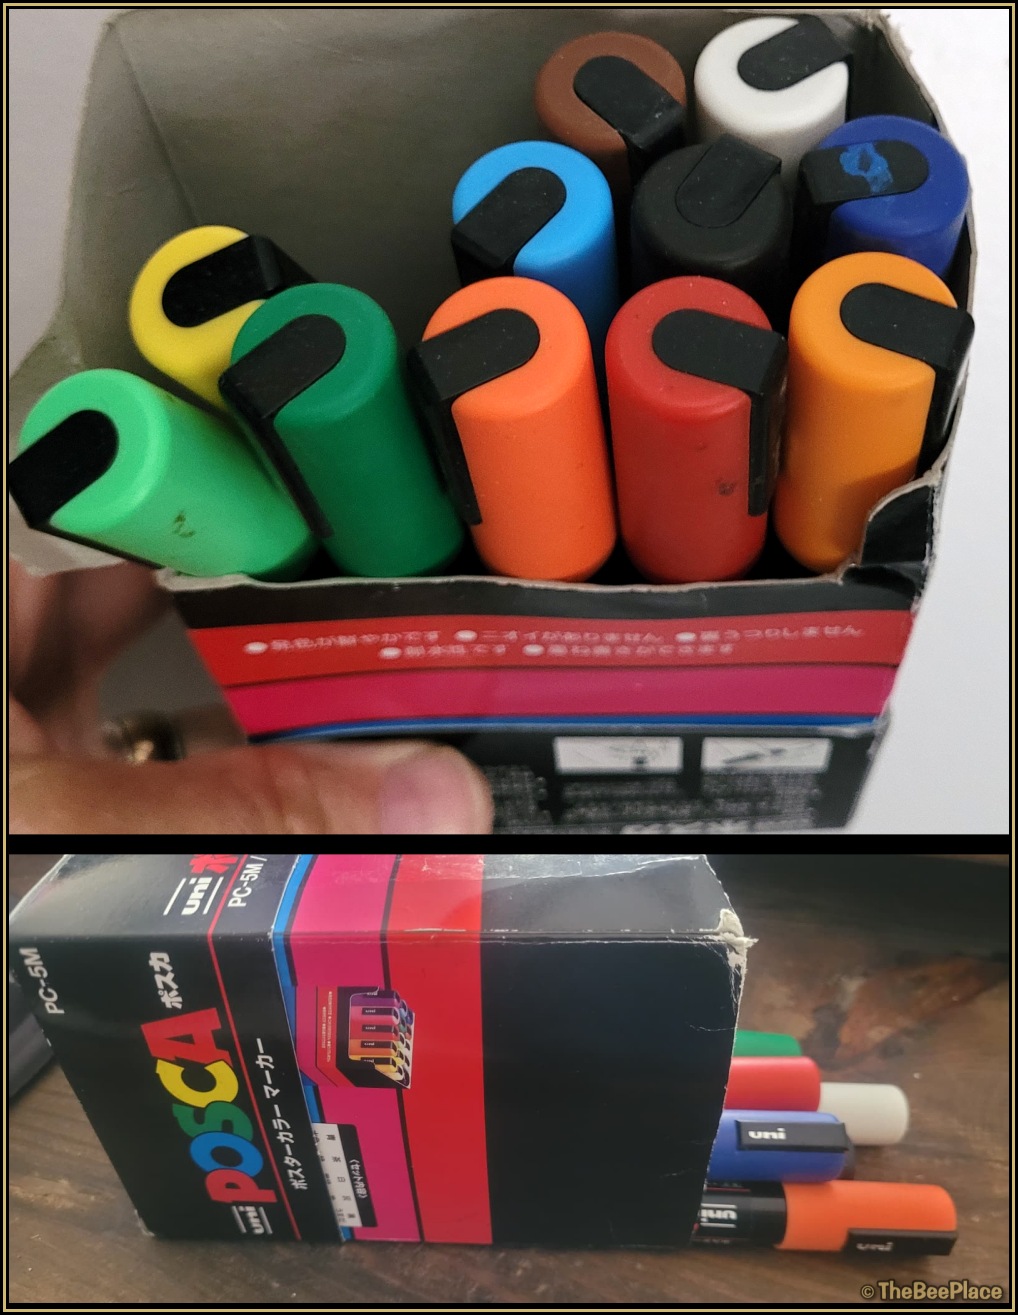
Marking Pens & Color Options
We use water-based paint markers such as POSCA fabric marking pens for marking queens. These are non-toxic, easy to work with, and provide a clean, visible mark.
They are available individually or in multi-color packs. While only a few standard colors are needed for queen marking, having a variety on hand can be useful.
Before using the pen, always shake it well to mix the paint. These pens have a small internal ball that helps blend the contents.
Then, test the pen on a hive lid, frame, or other surface before applying it to the queen. They have a tendency to let out more paint than is needed if the pen is not used lightly, so just be aware and test first and you will be fine.
Testing it beforehand allows you to control the flow and avoid applying too much paint. A small, controlled dot is all that’s needed.
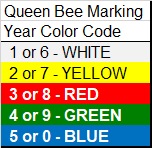
Standard queen marking follows a simple year color code: